


06 Jul Fourth of July parade float
If you’re like me, you probably have fond memories of picnics or BBQs with your family, watching fireworks at night at a city or county park, lighting sparklers in your driveway, or even attend the city’s annual parade. Well this year, I actually got to plan and MAKE a parade float.
Yep — make one. I had help, courtesy of my son’s Cub Scout pack (3-0-9!). But I was so excited to be able to plan out our pack’s annual parade float.
I had about a month and a half to plan it out, starting in May when the idea was first brought up. I scoured Pinterest and Google for ideas, as the parade theme was “Animation comes to life.” I settled on super heroes since we have a group of boys who were most likely to have this in common. The idea was simple: One truck would have a city scene made of boxes, with a super hero balloon in the city as if coming to the rescue. Comic book-style signs would cover the truck, and balloons would top off the decorations. Adults and boys would be in costume, wearing fun accessories in the super hero theme.

My initial sketch had a simple vision for the parade float. I was so excited to share this.
Main problem: No budget.
I was told that a scout is thrifty, meaning we had to use items we already had on hand or rely on parents for donations.
Thankfully, I’m a crafty gal so I already had a lot of supplies on hand. A quick research trip to the Dollar Tree proved 99 percent of the items could be purchased there. My sister had a ton of boxes thanks to her subscription to one of those dinner meal programs. One parent suggested using super hero costumes in lieu of the large balloons I originally envisioned. And the pack had a large bin full of flag-themed decorations they used in previous floats.
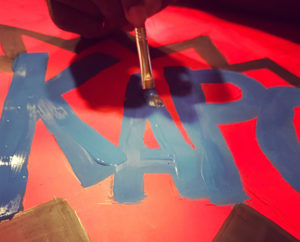
Hand painting signs turned out to be a lot of fun.
Our parents really came through with donations of crepe paper banners, foam and poster boards, glue, and paint. About a week before our first meet-up, I sketched out all the big signs like “Boom,” “Pow,” “Ka-Pow” so the group could just focus on painting. To show an example of the signs, I finished a few of the bigger ones so I could test out whether marker or acrylic paint would work better (acrylic won, hands down). My husband, ever the art director, helped paint one of the signs then teased me that I needed to “paint — not tickle!” Bonus points if you can guess the movie that quote is from.
I also needed to show an example of a sky scraper, so I had my kids help me paint an old flat screen TV box black. I found a large pile of white scrap paper, which we cut into squares and glued them on the box so they looked like windows. I made small speech bubbles out of foam board, while my daughter drew a couple of people in the windows so it looked like a scene from a graphic novel.
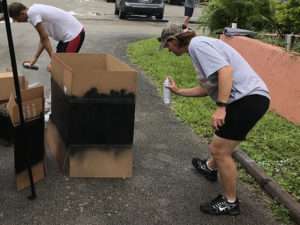
I didn’t realize how popular spray painting would be with our scouts.
Our first meet-up was the Saturday before the parade. A large group of Cub and Boy Scouts, along with their parents and siblings came out to help — an awesome turnout! I divided everyone up into 3 groups, with most of the boys spray painting the boxes black. The youngest kids helped paint the signs I had made, and a couple of guys stuffed some costumes with newsprint. As is the norm in Florida summers, it rained — damaging some of the signs in the process. But we managed to paint a massive amount of boxes, and the boys glued most of the paper squares on before it was time to go.
In the next three days before the parade, I repaired the rain-streaked signs and made a new batch of foam speech bubbles for the boxes.
One of the parents offered to finish pasting the windows on the boxes. I found out our banner from the previous year was M.I.A, so I had to buy banner paper (thank you Michaels’ coupons!) and make a new one on the night before the parade.
I managed to get a head and body for two super hero costumes, so I put a “skeleton” frame together out of wire hangers so the figures could be poseable and stuffed them with newsprint. I sewed my son’s soccer socks on the bottom of the costume’s feet, and sewed the sleeves shut on both bodies. Spiderman’s head was stuffed with paper and the mask sewn into the costume. A large foam ball was used to fit inside Batman’s cowl and stuck on the wire neck, while my son carved his mouth. They were so realistic that we managed to fool both my husband and a neighbor into initially thinking Spidey was a child.
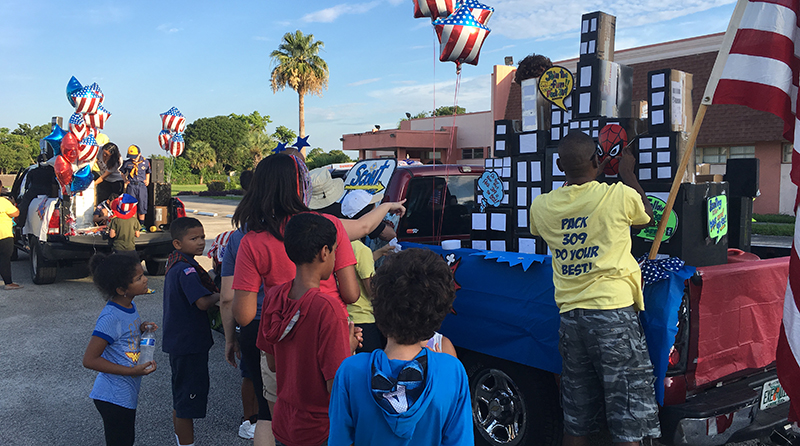
On the day of the parade, we had two trucks to decorate. Thankfully, we had enough boxes to create a skyline on both sides of the truck. We used colorful plastic table cloths to drape over the sides of the trucks to display signs and super hero masks. We had more than enough signs for both trucks: a mix of store-bought and homemade signs. I used the larger speech bubbles to place on the window by the doors so it looked like the driver was talking to the audience. I stapled some signs onto painted stirring sticks that we could carry as we walked the route (and made for great sun shades).
Parents donated the paper masks, and I made a bat signal out of the back of a paper plate, and made some quick batarangs with foam board. And we had lots of star-shaped balloons in blue, red, white, and flag-theme to put on the corners of the trucks. The old float decorations came in handy too to help top off the trucks. We went through many rolls of packing and masking tape to assemble these masterpieces together.
I was really pleased with how the floats turned out. Someone asked me if the finished product was close to my vision. I certainly think so, but you can judge for yourself by checking out Cub Scout Pack 309’s photos from the Sunrise July 4th parade on Facebook or Instagram.
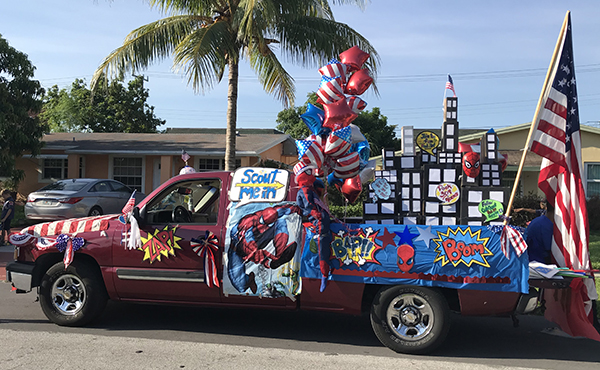
I christened this one the Spidey truck
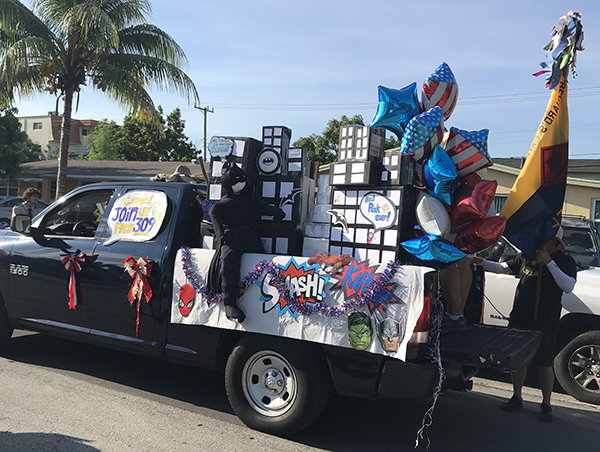
Our take on Batman and Gotham City, with some collaboration between DC and Marvel.
I’m already looking forward to next year’s parade. I found some great pics on Pinterest of floats that used pool noodles as the main medium! So many ideas!
No Comments